Thursday, December 18, 2008

Demolition: Wheel Hubs and Transaxle

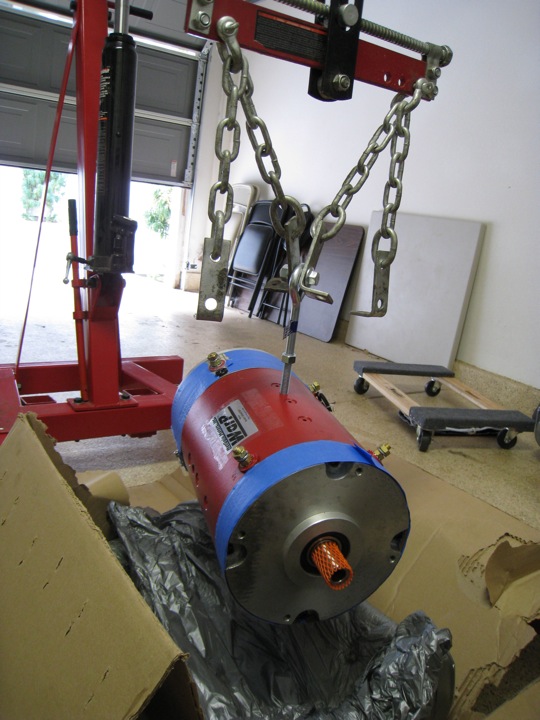
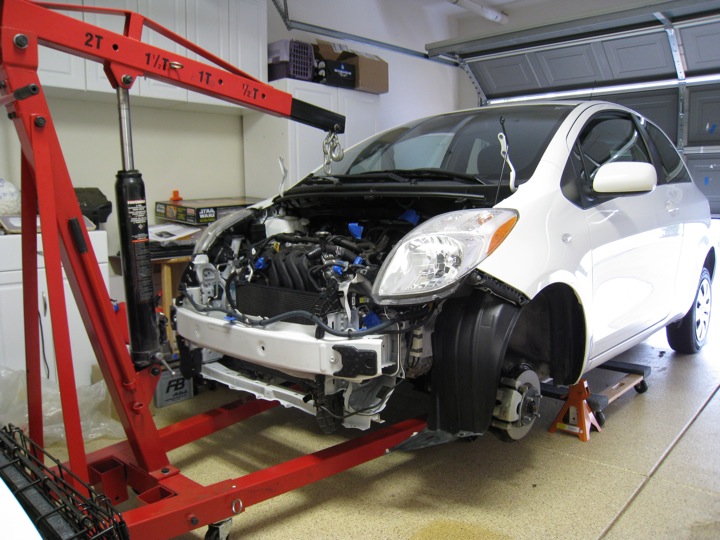
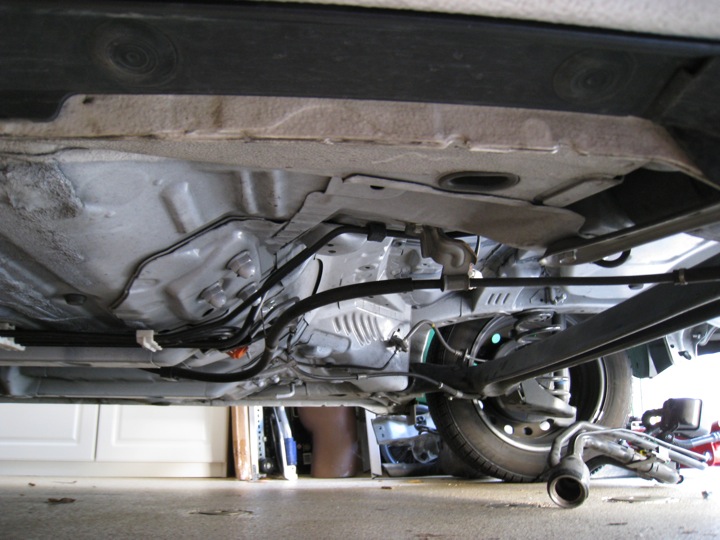
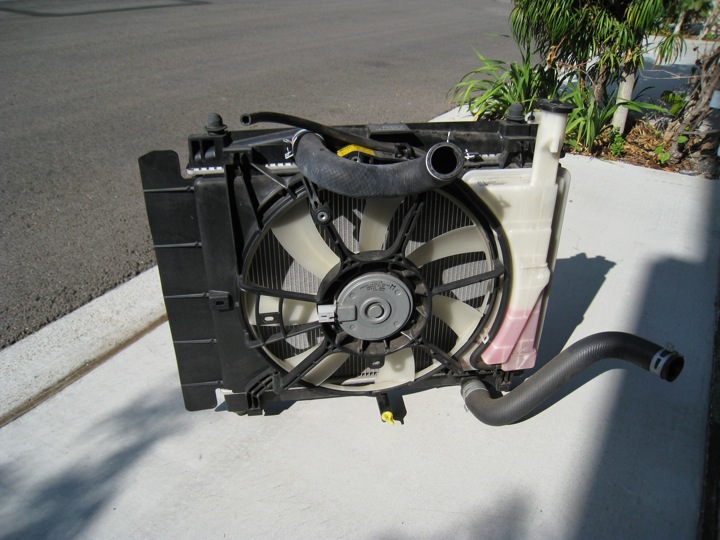
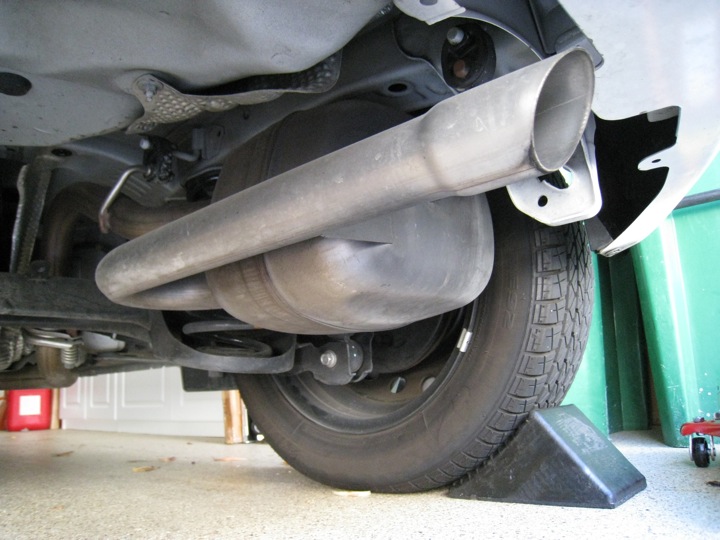
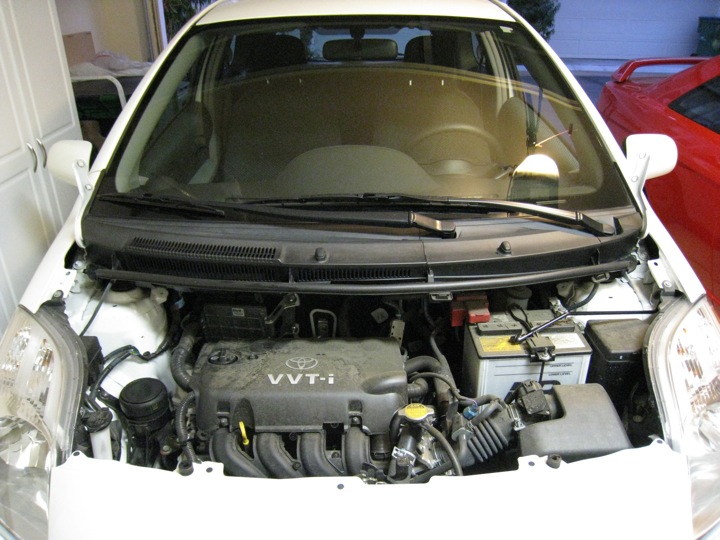
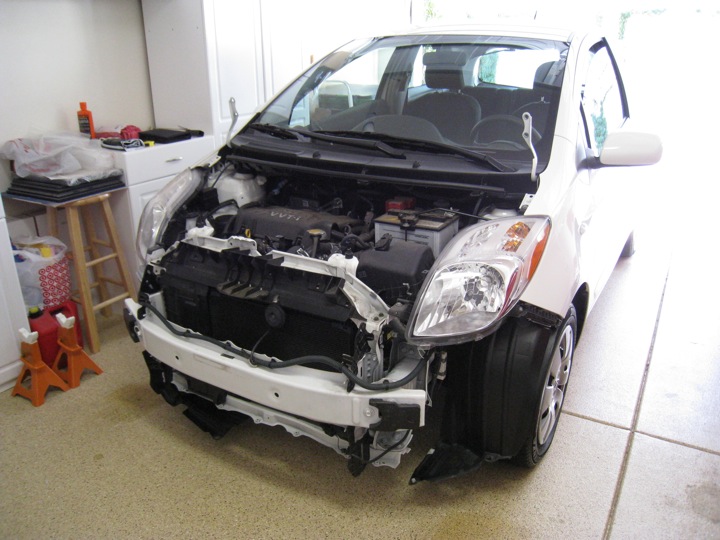
In order to get the engine and transmission pulled from the engine bay, the drive shafts need to come out of the transaxle and wheel hubs. After removing the drivers side wheel/tire, this is what the wheel hub, brake assembly, and front suspension looks like:
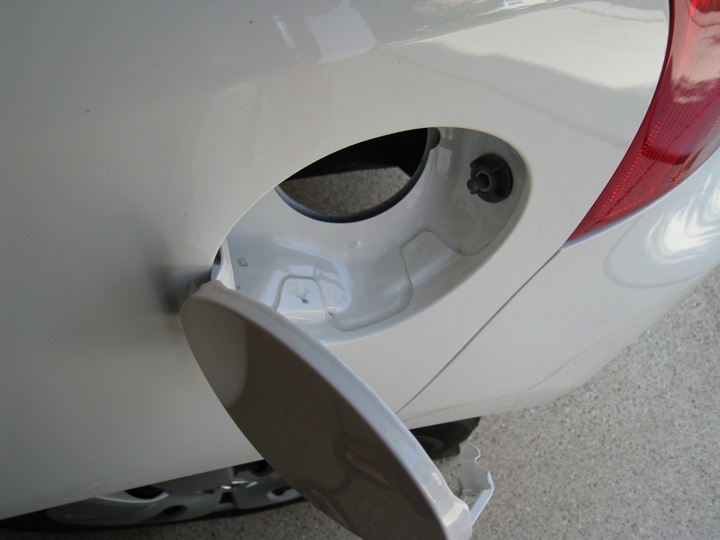
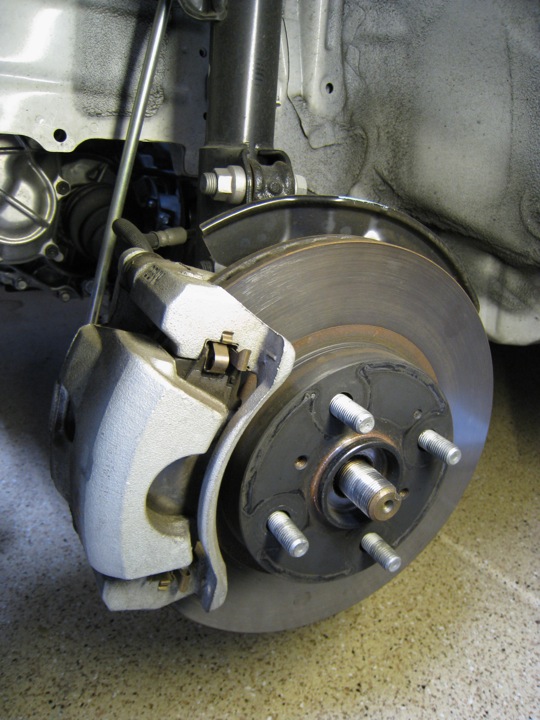
After removing a few nuts and retaining pins, I made good use of a ball joint separator I ordered online and popped the lower suspension arm free. Next, I proceeded to pull the outboard drive shaft spline out of the wheel hub and swing it out of the way. I repeated these steps on the passenger side wheel hub.
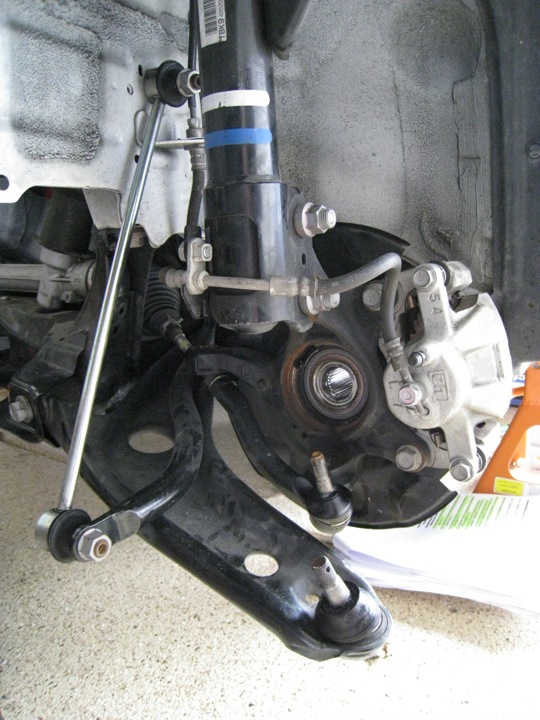
Below is a close-up of the splines as viewed from the back side of the hub. 
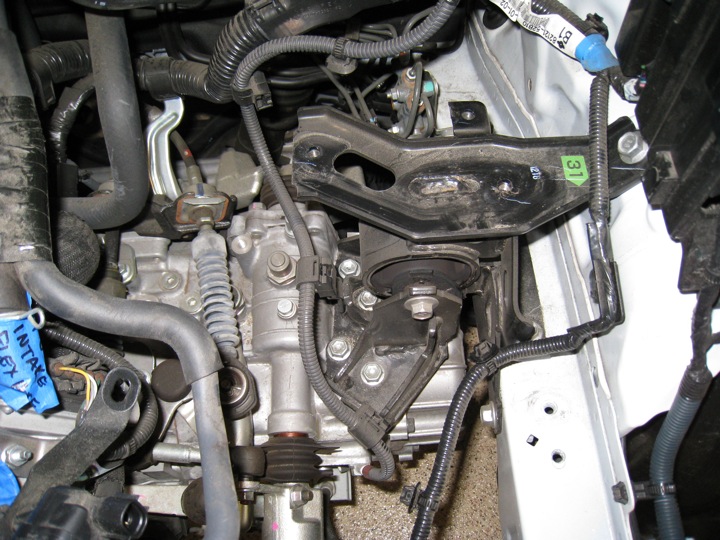
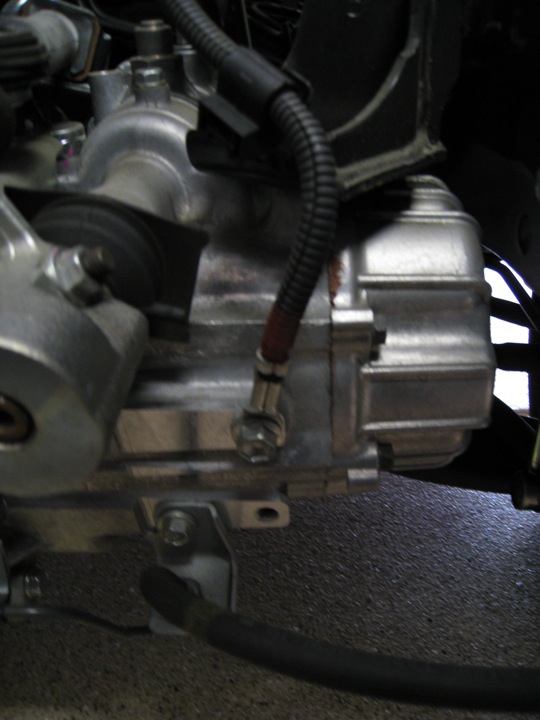
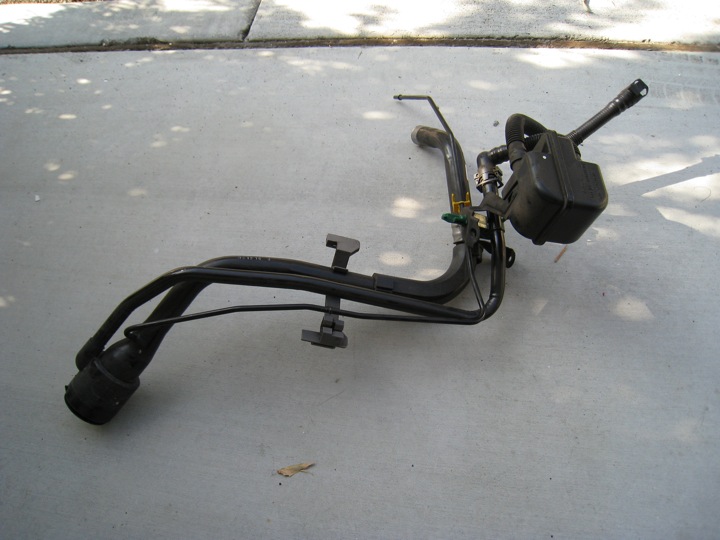
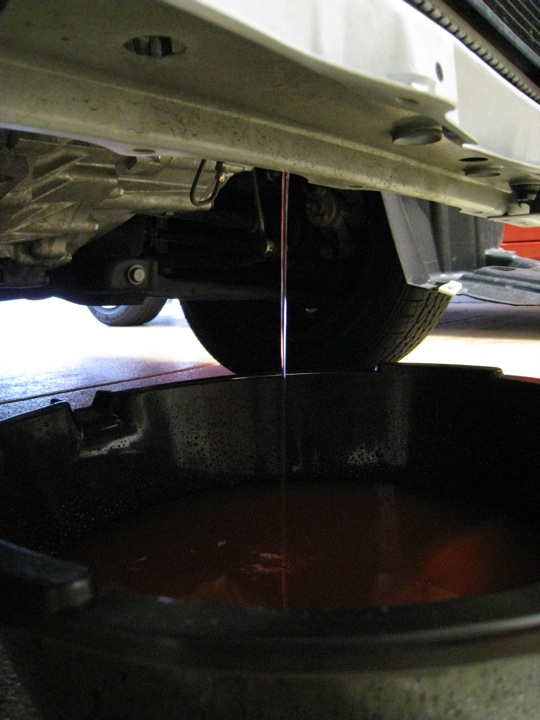
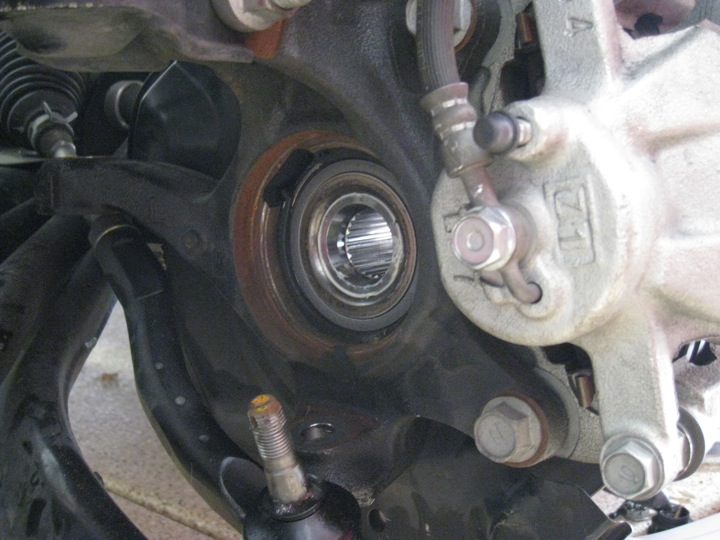
The first step to pulling the drive shafts out of the transaxle is to remove the manual transaxle oil. Out comes the plug and the oil runs into a drain pan. This stuff is really dark.
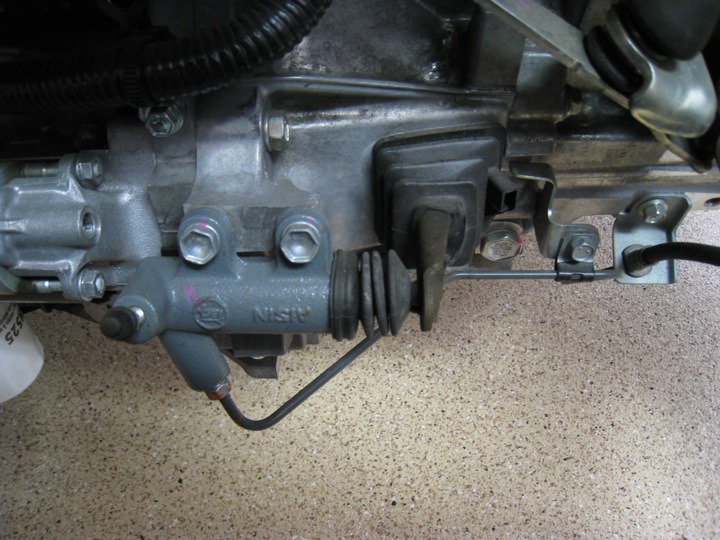
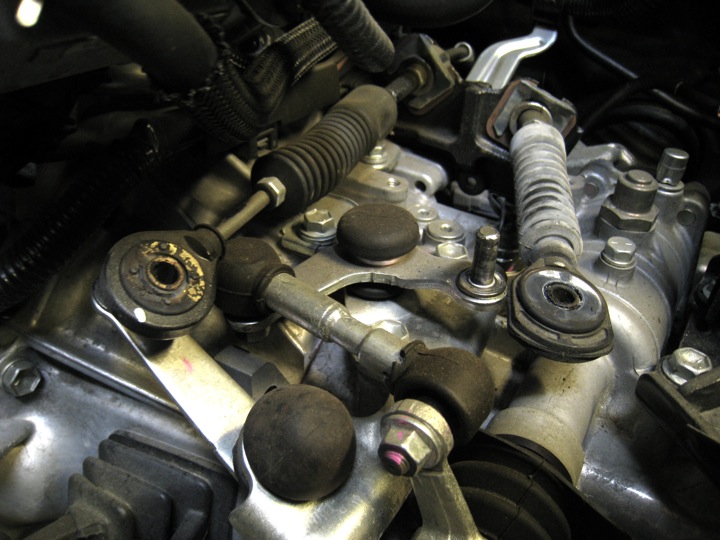
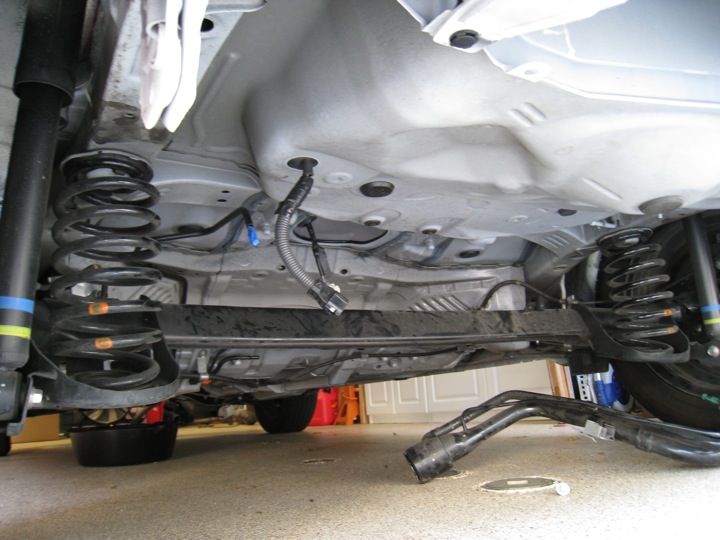
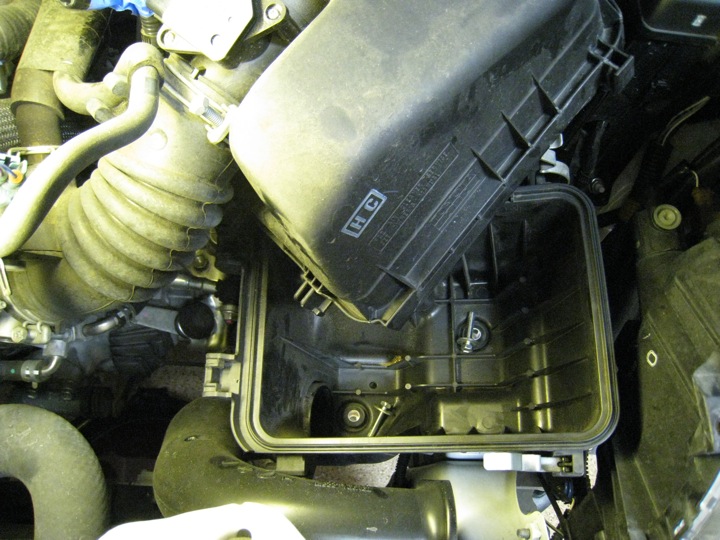
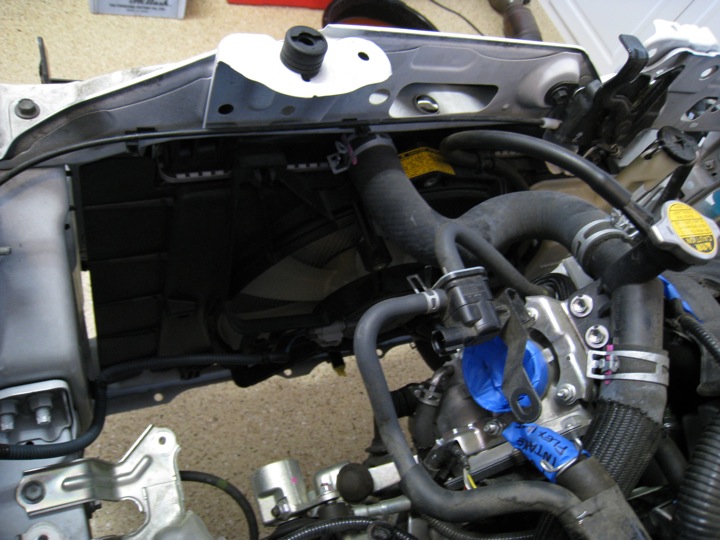
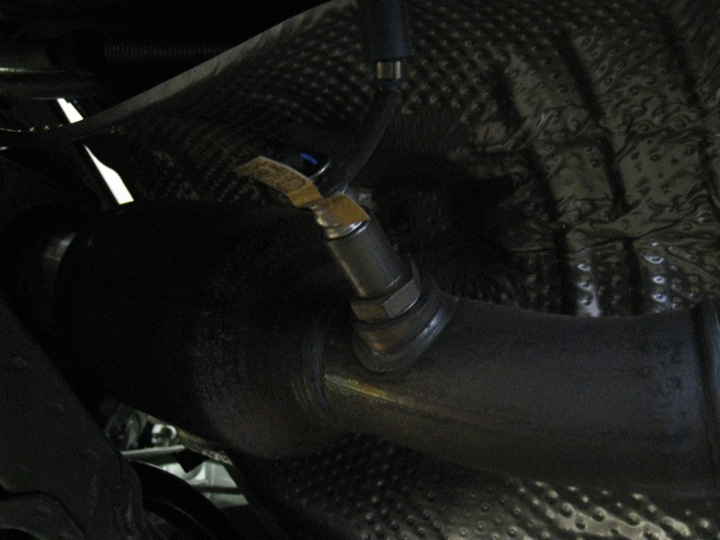
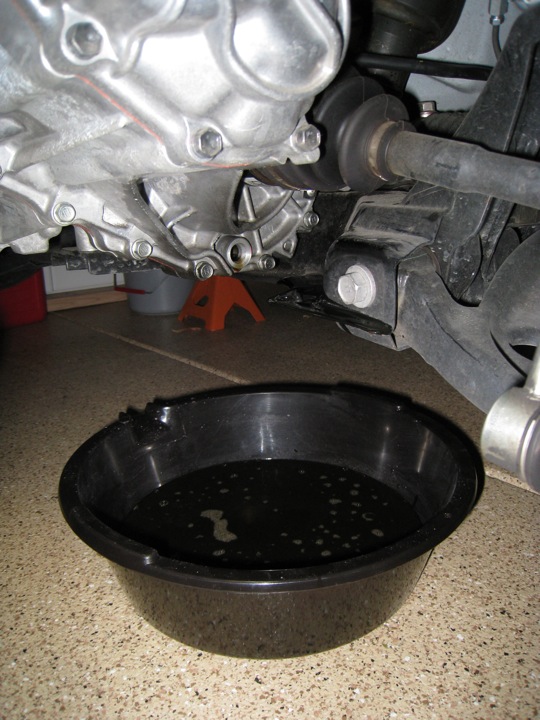
Can you see that notch in the black metal (above the clamp holding the protective boot and below the barcoded label)? The manual says to use a slide hammer with  a special hook attachment at the end to snag the edge of that notch to yank the drive shaft out of the transaxle.
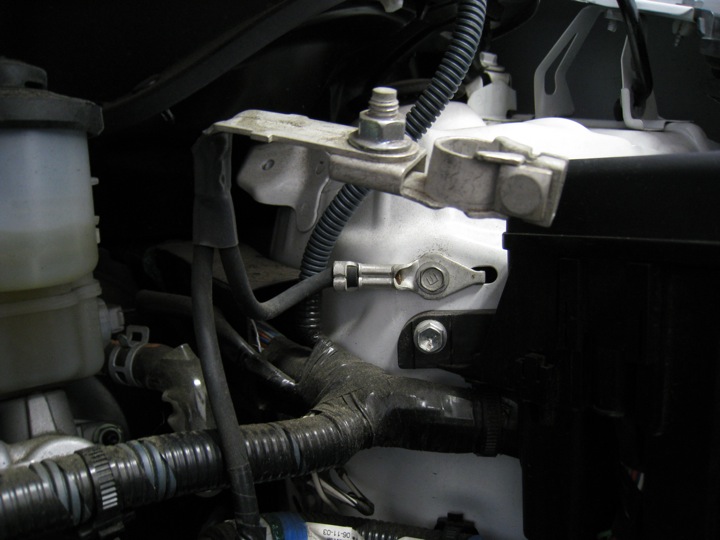
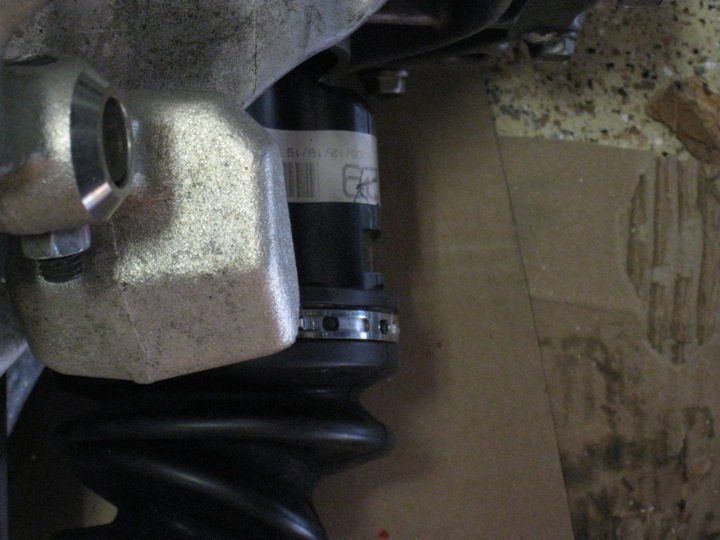
Unfortunately, this step has me temporarily stuck. I've tried several tools, several methods, and read numerous accounts of how people were able to remove similar drive shafts from Toyotas. For now, none of these approaches have succeeded. Until I can figure out how to get around this issue, I can't proceed to unbolt the engine mounts from the chassis and remove the last of the internal combustion components. Roadblock #1.

Wednesday, December 10, 2008

Demolition: Linkages and Windshield Wipers

There are a lot of little things that are mounted and/or connected to the transmission housing. My next task was to carefully photograph, diagram, and label all the parts that had to be disconnected or removed so that I could reassemble them properly since I am retaining the vehicles stock transmission.
Above: this piece pushes on the clutch fork, which in turn moves the throw out bearing inside the transmission housing.
Below: the shift linkage that come through the firewall from the cabin are mounted to the top of the transmission. 
Next I removed the front windshield cowl and complete windshield wiper assembly. These parts need to be removed in order to lift the engine out of the car. In addition, I found out that you can't remove the wiring harness at the ECU with these pieces in place. Everything is crammed into this engine bay.
Here is a photograph of the engine bay showing how everything looks when most of the disconnecting work is completed. At this point, there are some things I need to disassemble at the wheel hubs and the transaxle before I am able to hoist this engine out.

Monday, December 8, 2008

Tools for heavy lifting

A friend of mine loaned me an engine hoist. While I wasn't quite ready for it, I didn't want to not have it when the right day came. So I loaded it into my Prius and brought it home early. While I have it early, I thought it would be a good opportunity to lift the motor out of its box and prep it a little.
Using some low-tack painters masking tape, I covered up the grills/openings on the motor to ensure that no debris would accidentally fall into it while I work on the car. Once fabrication of new parts begins, there is a chance that something could get in there and cause problems later. Problem avoided.
Here's a photo I really like. I wanted to check and make sure that I could position the hoist properly and get the engine out given the limited space I have in our 2-car garage. The Yaris is parked such that it is very close to the garage door (about 1 foot gap to the bumper) and there is probably 6 feet or so between the front bumper and the garage wall. So, I was concerned about getting the hoist in place and having room to maneuver. It looks like things will be fine.

Saturday, November 29, 2008

Demolition: Engine Electrical

In the process of removing all of the electrical wiring and harnesses that connected the engine to the 12V battery, this mounting plate (used to support the battery) was removed.
After removing it, access to the transmission side motor mount is a snap. It's the black metal bracket that connects to the chassis on the right side of the photo below:
Several grounding points were also disconnected at this point.
Finally, I loosened the alternator mounting bolts and removed the belt. This allowed me to remove the alternator.
Sometimes it feels strange taking apart a nearly new car. Especially when you remove parts that looks brand new such as this. The last major electrical connection was the wiring harness at the car's ECU. A hinged lever keeps the connector secured. Lifting it was all it took to disconnect the whole harness. Now the engine is only connected to the chassis mechanically.

Saturday, November 15, 2008

Demolition: Fuel System

My goal today was to remove all of the components related to the fuel system from the car. I started by syphoning as much gas as I could from the tank using a small hand-pumped...
With very little fuel left in the tank, it would be much lighter and easier to lower from the car once I unbolted it. Under the car, I pulled some thin metal heat shields off and was quickly able to remove the fasteners holding the tank to the chassis.  Only a few hoses and lines needed to be removed to drop the tank out. Here is the plastic fuel tank below:
This device (called the canister) was adjacent to the gas tank. It was also straight forward to disconnect and remove.
These tubes used to route incoming gas from the fuel filler door to the tank:
Here are a couple photos of the area where these components used to reside. The thin tube with blue tape wrapped around it is a fuel line. These were also removed by pulling them out of the plastic clips securing them to the chassis. The clips were retained because they secure brake lines running to the rear wheels. 
The gas tank filled most of the negative space seen in the above photo. A portion of the tank was situated over that metal suspension crossmember. As I'm slowly finding, space is used very efficiently in this car.
It was very rewarding to pop open the fuel filler door after all the parts had been stripped from the Yaris. Seeing a void (more accurately my garage floor) where the old gas cap used to be brought a smile to my face. No more gasoline.

Wednesday, November 5, 2008

The motor arrives

This is just a quick update to mention that my electric motor has arrived. I purchased a NetGain Warp 9 DC motor. I took the morning off to wait for the UPS freight truck to arrive with my heavy delivery. Weighing around 150 lbs., it is a bit difficult to move while in the cardboard box.
Inside, the motor is surrounded by expanding foam wrapped in plastic. The shafts are protected by cardboard inserts at either end. Sadly, the protective perforated grill on the right had a large dent in it. A quick email to the distributor yielded an RMA for the grill. However, I ended up taking it off and carefully warping it back into shape myself. The metal is quite malleable. 

Saturday, November 1, 2008

Demolition: Radiator and Air Intake

I figure it's worth mentioning, the car's battery was removed from the car. You may notice it missing in subsequent photos. It's necessary to disconnect and remove it before starting to work around the engine bay with metal tools. Since I'm dealing with wiring, oils, and fuel, I don't want any sparks flying.

On to draining the coolant from the radiator/engine. There are a few big hoses to disconnect after the drain plug stops spewing pretty red liquid. Once I collected all the coolant I bottled it up in a gallon jug to take to a proper disposal facility.
Removing the air intake is really straight forward. The top pops off by removing some metal clips. Below the filter are some bolts that hold the air box down. The mass air flow (MAF) sensor gets unplugged from the flexible hose leading to the throttle body. A hose clamp or two later, and the whole assembly lifts out of the car.
Good to go.
This leaves a nice void where I can finally see some of the garage floor. Note the battery is missing too. It used to reside between the air intake and the firewall.
Remember that support piece I mentioned earlier that held the horn and hood latch/release? Well it comes off with a few bolts as well. This makes it possible to remove the radiator and fan (second photo). 
Here's the radiator assembly. Fan with motor, shroud, reservoir, evaporator, and some hoses. It's going to be sold as well.

Saturday, October 25, 2008

Demolition: Exhaust (part II)

In order to remove the rest of the exhaust system (from the manifold back), this pesky little oxygen sensor has to be disconnected first. The wire from the sensor passes through a grommet in the bottom of the car into the passenger cabin. Sorry about the dark photo.
The center console needs to be disassembled in order to access the spot where the oxygen sensor comes through the floor of the car. Here I'm taking apart the shift assembly first so that the plastics can be removed.
Once it's all apart, I disconnected the sensor via a wire connector, and then re-assembled the interior parts. Here's a peak before I tidy up. 
Finally, 2 bolts at the exhaust manifold get removed, then there's more pushing and pulling on hangers/mounts. Now I've got a bunch of pipe free from the car. Say good by to the stock exhaust. In addition, many thin metal heat shields were unbolted from underneath the car. They used to insulate other components (like the fuel tank) from the usually hot but recently removed exhaust system.

Demolition: Exhaust (part I)

Perhaps demolition is a strong word for what started today. Pulling the exhaust system off the car began with muffler. It's the smallest muffler that I've ever seen. Here's the business end:
Just a quick unbolting forward of the rear suspension frees the muffler from the mid-pipe. Then it's time to wrestle with those stubborn rubber mounts.
For sale:

Sunday, October 19, 2008

Preparation begins

I didn't have a lot of time, so I removed the hood and the front bumper. This will make my life easier for the next few weeks. It's also nice because I don't have to worry about scuffing, or otherwise damaging the body of the car while I work over the engine bay
Above is the hood resting on the ground after I took it off. I marked where the mounts lined up prior to removing it so that in can be re-installed with proper alignment later.
Here's what the tiny engine bay looks like. Actually, there's a fair amount of space in the car's compact front. The front bumper covers a good portion of the useable space. It's held on by a fair number of bolts, plastic clips, etc. Nothing new to me except these plastic cleat-like mounts secured to the fenders. I really thought this was a nice bit of hardware so I snapped a shot:
Once the bumper was removed it looks less cramped in there. There's also a support structure (painted white) that crosses the engine bay. It holds the horn, hood latch/release, as well as the top of the radiator. I'll remove that a bit later.

Saturday, October 11, 2008

Going Off-Road

I drove the Yaris for a while to make sure everything was mechanically sound. I also wanted to get a good feel for the pre-conversion handling and performance characteristics. Alright, it was also really fun to drive and I almost couldn't stand the idea of not driving it for however long the conversion will take. 
At 14,674 miles, I took it in for a nice wash and wax, a thorough interior cleaning, then pulled it off the road.
One of the reasons I chose to go with a new car for my conversion was that I knew I would not have to spend any time restoring the car mechanically or cosmetically during my conversion. That's not to say that I don't have any aesthetic enhancements planned, but they won't be necessary to get the car into a desirable condition for daily driving. As you can see from the photo above, right after the car was cleaned it looks brand new.